Read Time: 2 Minutes 51 Seconds
Hey — Ryan here.
In today’s edition:
The key mistakes ruining your videos.
How to instantly fix bad lighting and dull visuals.
The 4 tools you need for professional-quality videos.
Filming videos can feel overwhelming when you’re starting out.
But you don’t need expensive gear or years of experience to achieve that professional look.
Today, I’m breaking down 7 simple, actionable steps to improve your video quality instantly.
Let’s get into it.
What You Need to Get Started
1. A light source (natural like a window, or artificial like a lamp). Any light source works!
2. A phone or camera.
3. A tripod (or anything stable to hold your device).
4. A microphone (clip-on mic, wireless mic, or the one built into your phone).
1. Lighting Changes Everything
Lighting is one of the most important factors for making your videos look polished.
Even more important than which camera you use.
The right lighting creates depth, highlights your subject, and sets the mood.
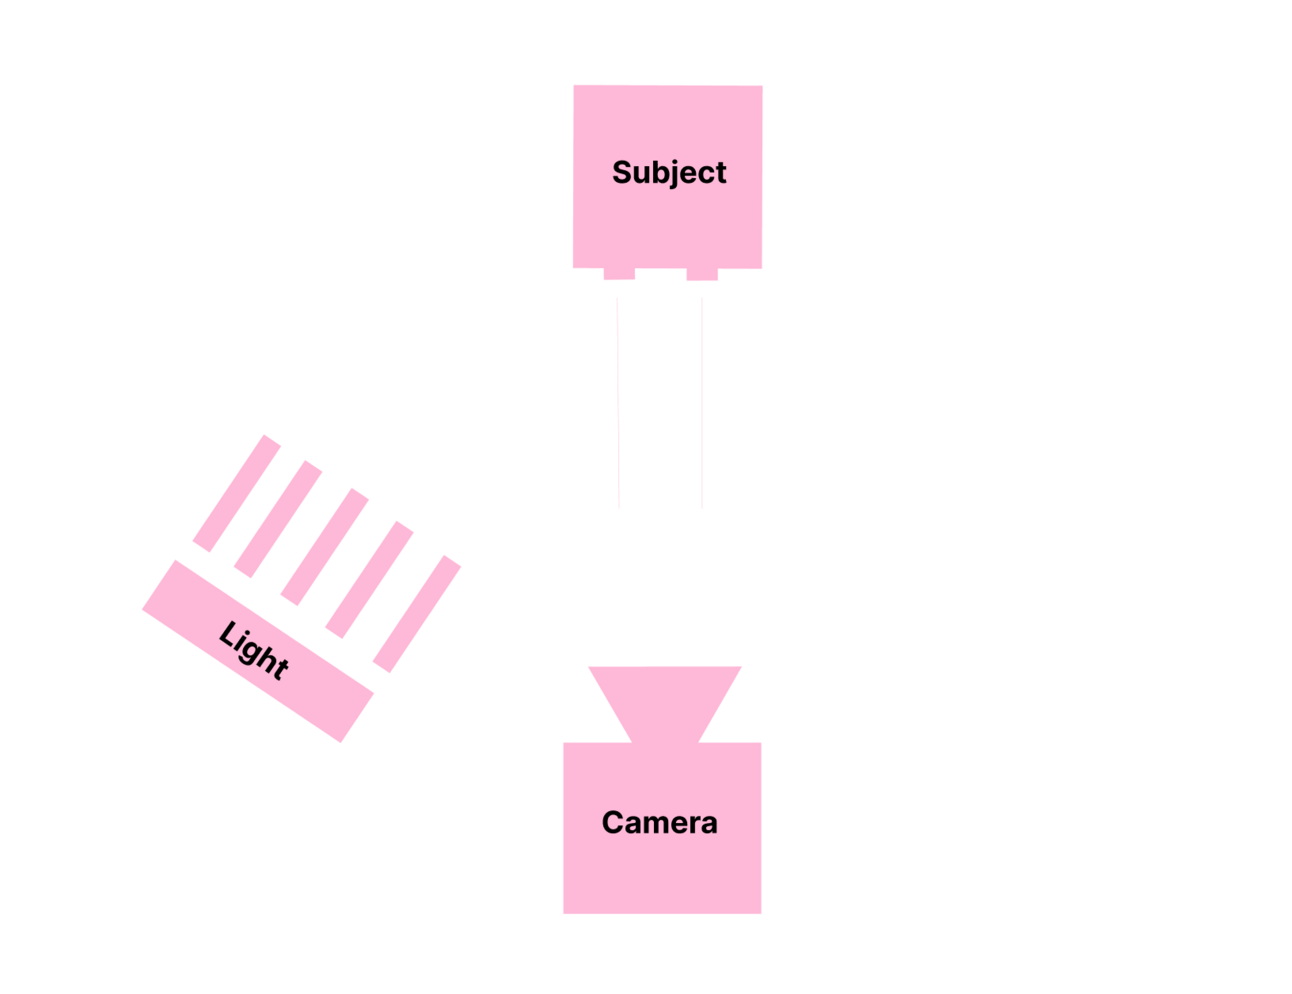
Position your light source at a 45° angle to your subject’s face for natural shadows.
Use soft, diffused light for a professional look (a lampshade, white curtain, or piece of white paper works wonders to soften your light source).
Natural light? Shoot near a window during golden hour to get soft lighting on your face.

Position the light source at a 45-degree angle to the subject’s face.
Lighting doesn’t need to be expensive—use what you have and experiment with placement.
Notice here how @seanoulashin’s face is partly lit, with shadows on the opposite side of his face.
2. Choose the Right Background
Your background sets the tone for your video.
A cluttered or flat background can distract from your message,
while a thoughtfully chosen one enhances it.
Avoid flat walls—place your subject in front of a corner for depth.
Keep your background tidy and intentional (plants, bookshelves, or small light sources).
Add depth by placing props at different distances from the camera.
A dynamic background instantly makes your video more visually appealing.
Notice here how @chloe.shih is filming with the corner of the room behind her. This makes for a more dynamic, 3-dimensional background, as opposed to if she had a flat wall behind her.
3. Frame the Subject’s Eyes Correctly
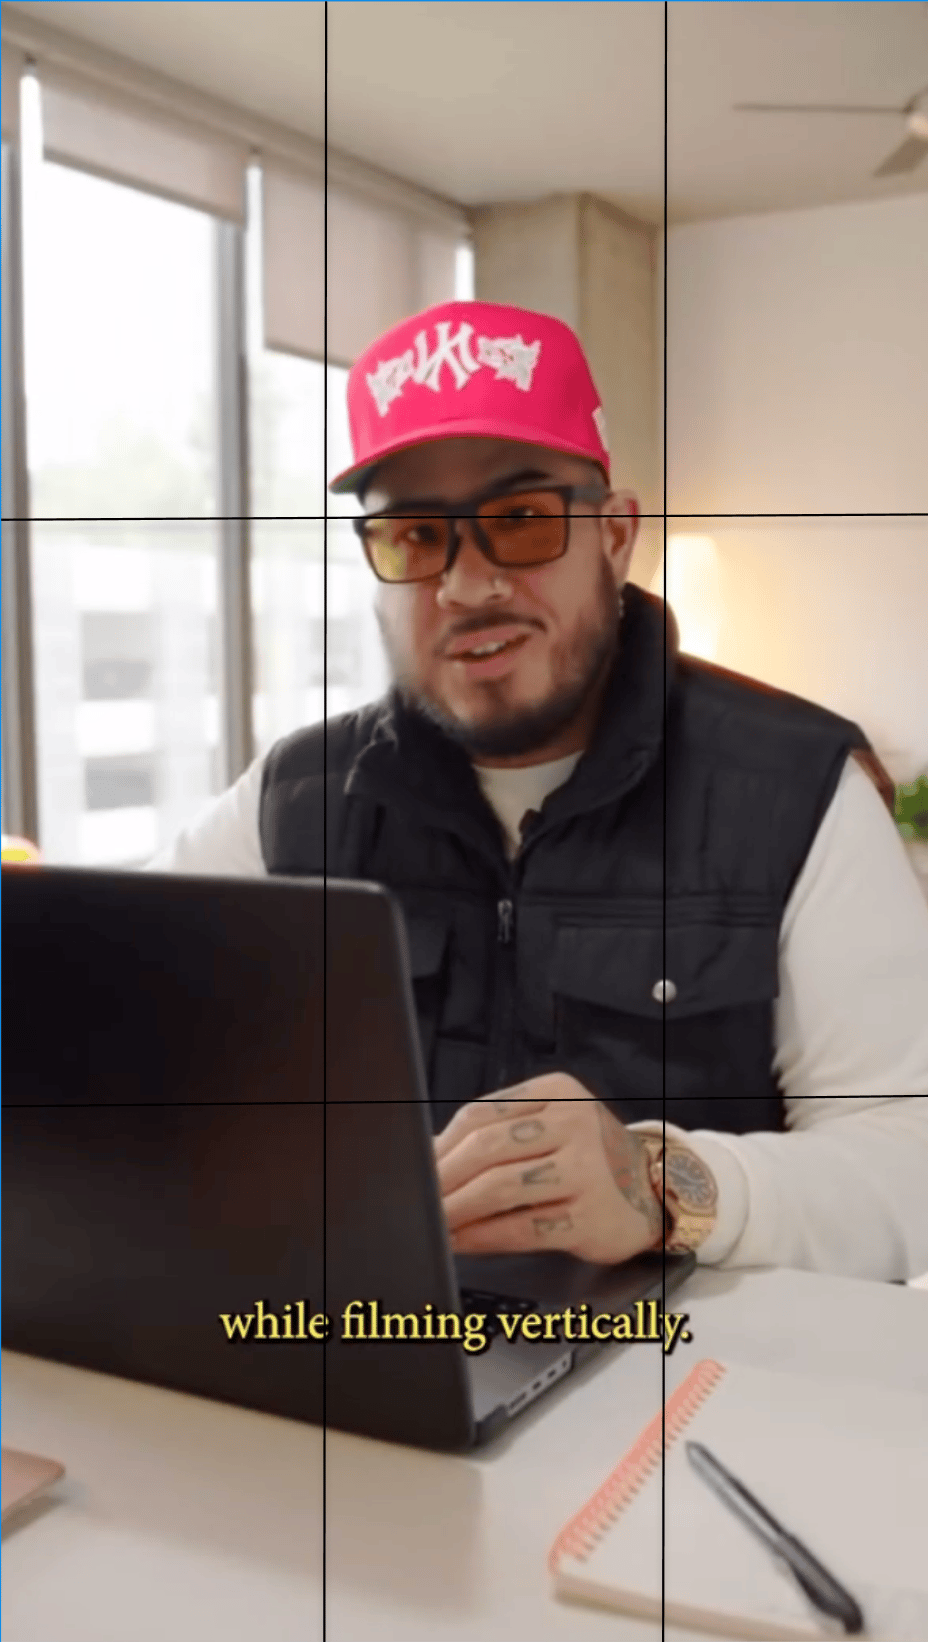
Good framing draws attention to your subject and feels balanced. The rule of thirds is a classic method to achieve this.
Position the subject’s eyes along the upper third gridline of the frame.
Leave some headroom (but not too much!).
Following this rule creates professional-looking videos with ease.

See how @omgadrian’s eyes hit that upper one-third.
4. Keep Your Camera Stable
Shaky footage screams amateur.
A stable camera makes your shots easier to watch and more engaging.
Use a tripod or prop your phone/camera on books or furniture.
If filming handheld, use a gimbal or stabilize your arms against a surface.
Stability transforms even basic shots into professional-quality visuals.
5. Focus on Clean Audio
Your audio makes or breaks your video.
And even if your visuals aren’t perfect, clean sound keeps viewers engaged.
Use a mic (clip-on mic, wireless mic, or the one built into your phone).
Film in a quiet space to avoid background noise.
Prioritize sound—it’s one of the easiest ways to elevate your video’s quality.
Adobe’s free online tool uses AI to clean audio and podcast-ify your voice.
I’ve used it in my videos for months now and it’s made my audio quality that much better.
6. Use B-Roll to Tell Your Story
B-roll footage is a must-have for engaging visual storytelling.
It’s a great way to keep viewers hooked, but also to visually depict your speaking points.
Film related actions or scenes (e.g., pouring coffee while talking about morning habits).
Use B-roll to break up talking-head shots and avoid monotony.
Choose any combination of close-up, waist-high, and full-body shots for variety.
You’ll notice your video feels richer and more alive.
Check out @tomnoske’s simple, yet stunning B-roll footage in this video.
7. Focus on Facial Expressions
Your face is a powerful storytelling tool.
Practice being expressive and engaging without overdoing it.
Use your eyes to connect with the camera, but be careful to keep your gaze warm and inviting (which takes active thought).
Ok, here’s the technique I’ve used that’s made me so much more comfortable on-camera.
Imagine a close friend on the other side of the camera
Pretend to talk to them about your day for 2 minutes before starting your script.
Start speaking your script with the same tone, facial expressions, and cadence as in step 2.
You’re a pro!
Remember, your expressions can convey emotions that words sometimes can’t.
Want a Free Case Study?
How did you like today's newsletter?
Thanks for showing up this week. We’ll see you in the next :).
Sincerely,
Ryan
P.S. If you're ready for more, we’ve got you covered:
Access case studies - Breaking down how top creators and brands grew 7-figure businesses.
Work with us 1:1 - For those serious about adopting next-gen content & marketing strategies.